Christmas and New Year celebrations are over and the new school year has begun, I hope you all had a safe and happy time with family and friends!
Nearly two years ago I saw this idea for a beach towel with pillow and saved it as a great gift idea. Finally I had the opportunity to make some! My son had two of my nieces for whom he needed to arrange Kris Kringle presents, and when I suggested these towels for them he was very keen!

If you think you might like to give this pillow towel a go (and you should!), make sure you don’t leave it ’til the last minute! They took me several hours each to make, even though they really are relatively easy to do. But we were very pleased with the final results 🙂
I roughly followed Stella’s instructions here, but still sort of worked it out as I went along.
You will need 2 towels, some fabric for the trim and pockets, Velcro, and a pillow. I managed to find pillow cases in almost perfectly matching colours! My trim fabric was about 50cms-worth, but it depends how much trim you want to add. I do have quite a lot left over, and I do have another project in mind for that. You will notice that I have trimmed differently to Stella.
A sewing machine, thread, scissors, and tape measure would be handy too lol
Stella used wadding to stuff her pillow section. After reading the comments on her post, I decided to use a removable pillow so the towel can be easily thrown in the washing machine. If you can find an inflatable pillow, I think that would work well too. Some suggested leaving it empty so you can fill it with your rolled up clothes, or maybe another spare towel. You do need some sort of pillow though, as it won’t hold it’s ‘bag’ shape without one, and I’m not sure that rolled up clothes will do that.
I didn’t take photos of the whole process (I was too busy pulling out my hair!) but I’ve got a few…
Take your first towel and fold it over to create the pillow section. Allow extra when you cut as this will be where it gets attached to the second towel. Cut two lengths for the handle straps. You can make them as wide as you like. I thought it would be easier to carry with wider straps.
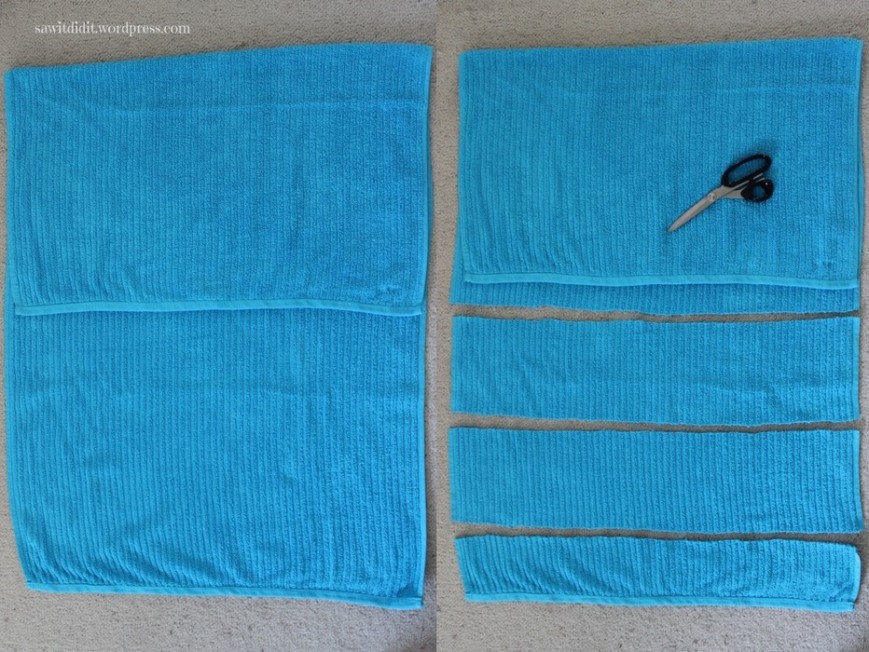
Sew the pillow edge down, than attach to the second towel. You might like to do a double row of stitching to give extra strength.
And that’s the extent of my photos of the creative process… There are more at Stella’s link above.
Insert your pillow, and roll up to work out where the pockets and Velcro will go. You might have to adjust the rolling slightly until you are happy with how it looks.
Sew on the Velcro under the end flap. I’m not sure if you should leave this until the last step, as the Velcro will catch on your towels and pull threads. But you do need to know the whole thing fits together properly, so I did the Velcro at this stage on each project.
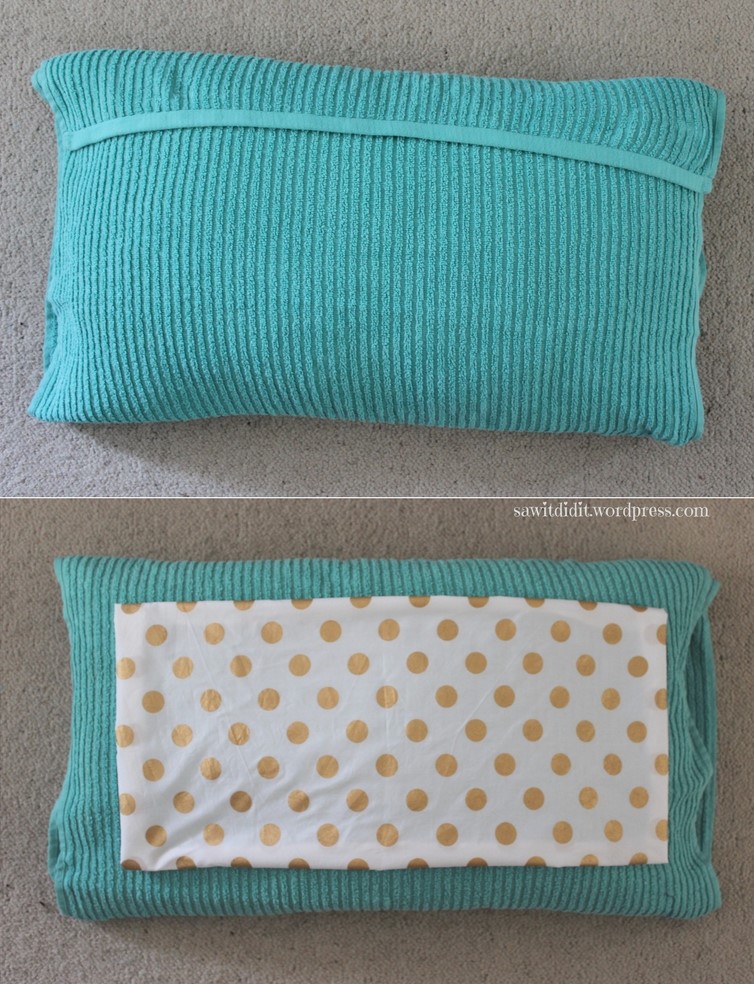
Work out the size and position of your pocket fabric. Firstly, sew the hem along the top side (where the pockets open), then sew around the other 3 sides onto your towel. When in position, you can sew more seams to create extra pockets. I double stitched all the these seams for extra strength.
I made 3 pocket sections – 1 big enough for a magazine in the middle, and smaller ones on each end for sunglasses, sunscreen, your phone, or whatever else you might want to take to the pool or beach. You can sort of see these in this picture:
To make the handles, sew them down the length then turn them inside out so you have long tubes with the seams inside. The ends will be already hemmed as you cut across your towel to get this fabric. Pin the handles on, and check that your ‘bag’ hangs nicely before you sew them in position. It’s also a good idea to see where they will be when unrolled. You don’t want to have the handles bunched up under your back when you are trying to relax! Hopefully you can position them towards the bottom of the towel.
Stella used her trim fabric to edge around the towel, but I decided to just trim one end to cover where I sewed on the Velcro. You do what you please!

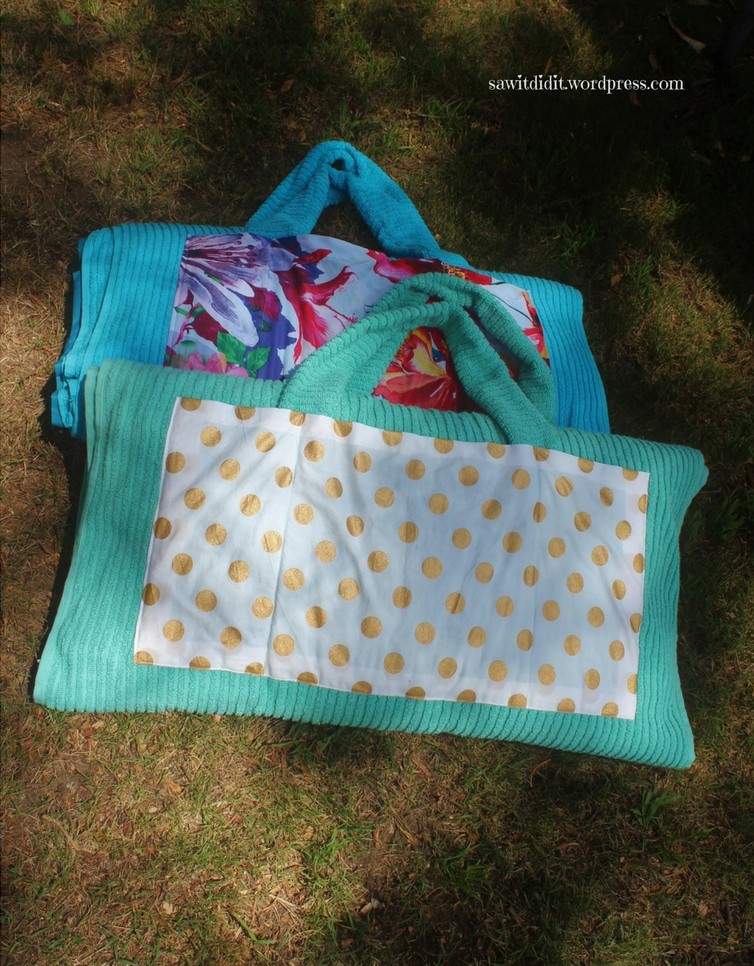
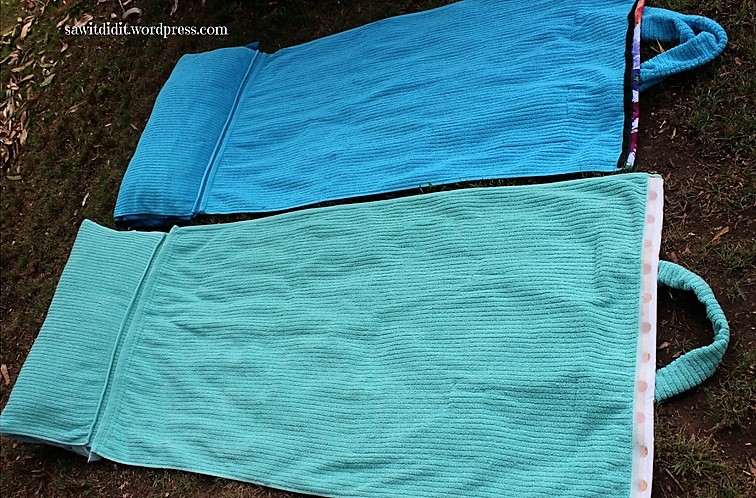
I should have got some photos of them in use at the beach over the holidays but I didn’t. So here they are in our backyard…
When I finished the second one, I said to my son that I wouldn’t be making any more. He was most disappointed as he wants one too! He thinks they are awesome!
Well done to whoever originally came up with this idea, they really are awesome!
Linking up with:
Life With Lorelei – Home Matters, The Pin Junkie, Organized31 – This is How We Roll, DIY Show Off – That DIY Party, Plucky’s Second Thought – Cooking and Crafting With J&J, My Pinterventures – Merry Monday, Claire Justine – Creative Mondays, Create With Joy – Inspire Me Monday, I Should Be Mopping the Floor – Inspiration Monday, DIY180 – Dishing It and Digging It, Lou Lou Girls – Fabulous Party, Our Home Away From Home – Tuesdays at Our Home, The Mrs Tee – Mommy Monday, The Dedicated House – Make it Pretty Monday, Cedar Hill Farmhouse – The Scoop, Little Bits of Home – Dream, Create, Inspire,Mother2Mother – Sunday’s Best, Nifty Thrifty Things, Love of Home – Sundays at Home, My Husband Has Too Many Hobbies – Snickerdoodle Create, Bake, Make, That Recipe – Happiness is Homemade, Oh My Heartsie Girl – Friday Features, Strawberry Butterscotch – Saturday Shuffle,Hello Little Home – Best of the Weekend, The Sits Girls – Saturday Sharefest, Claire Justine – Weekend Blog Hop, My Pinterventures – Merry Monday,

This is really nice. I sure wish I had followed through with my sewing lessons. This would make a cute gift for my granddaughter. Thanks for sharing on Sunday’s Best.
LikeLike
Thanks, Rhonda x I think that if you can sew straight lines, you would be able to figure out how to make something like this! xx Fiona
LikeLike
Pingback: Bookmark with Pen Holder | Saw it, Pinned it, Did it!
I love this idea! Definitely seems like an advanced project though. Your came out really well!
LikeLike
My sewing capabilities are in no way advanced! But this project does require planning and concentration lol Thank you for visiting x
LikeLike